When you want to change something in your home, it can be scary to do so.
Buying something can be a waste of money, but you can always remove it if you don’t like how it looks in your space.
But, changing the color of your walls is a big step, and it’s not so easy to fix it if you don’t like it.
Having a nice color on your walls can be great and sometimes you don’t need anything else to elevate the look of your home.
Since painting your walls is a major step for many people, here is a page for you to find out how certain colors look on the walls.
Sherwin-Williams Paint Color Visualizer

Sherwin-Williams is a leading company when it comes to paints and colors.
They are a billionaire company and every color and shade you imagine exists at Sherwin-Williams.
Because they’re so successful in this field, they know how complicated it can be to choose a color for your home.
They came up with an online color tool, called Sherwin-Williams Paint Color Visualizer.
This online tool allows you to:
- preview different colors before buying them and using them
- upload a photo of your room to experiment with wall colors
- use a preloaded image of a room to see how colors would look in real life.
- save favorite colors
- create color palettes
- see color recommendations for a certain design
Now that you know how cool this tool is, let me show you how it works and how useful it is through a series of screenshots.
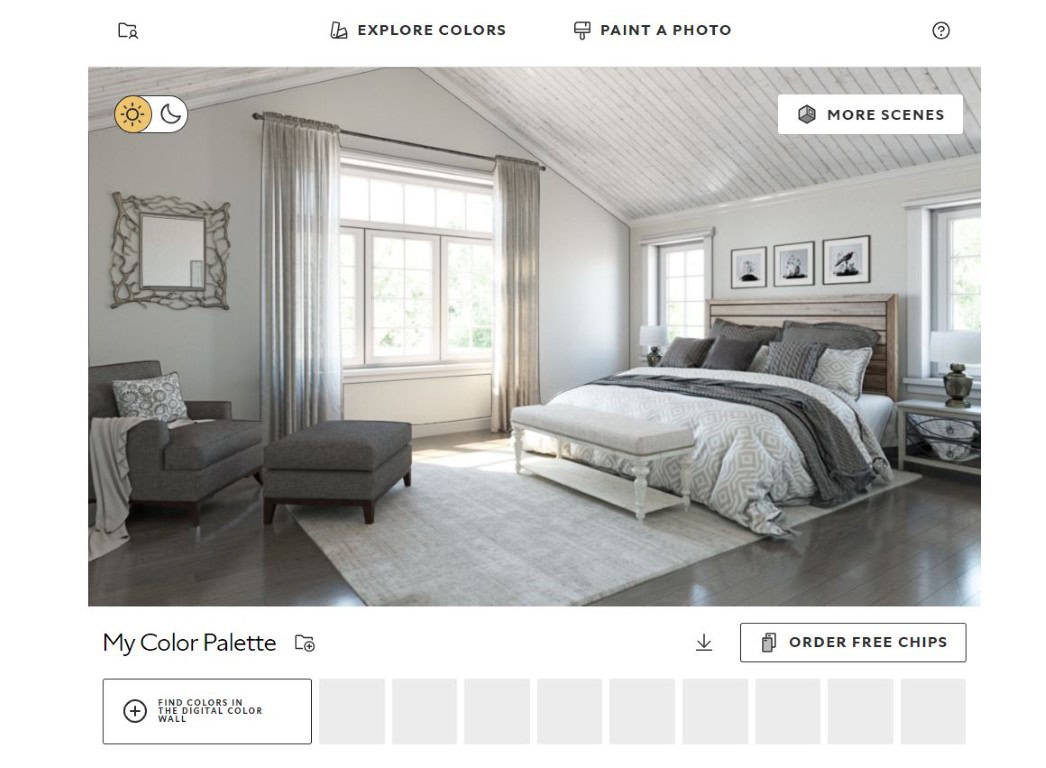
When you open the Paint Visualizer, this is what you will see. It’s very simple to use.
Above the image, you have two options – EXPLORE COLORS and PAINT A PHOTO.
On the image, you can choose MORE SCENES and DAY/NIGHT LIGHTING icon.
Below the image, you can see My Color Pallete and a download button.
I suggest exploring the colors first.
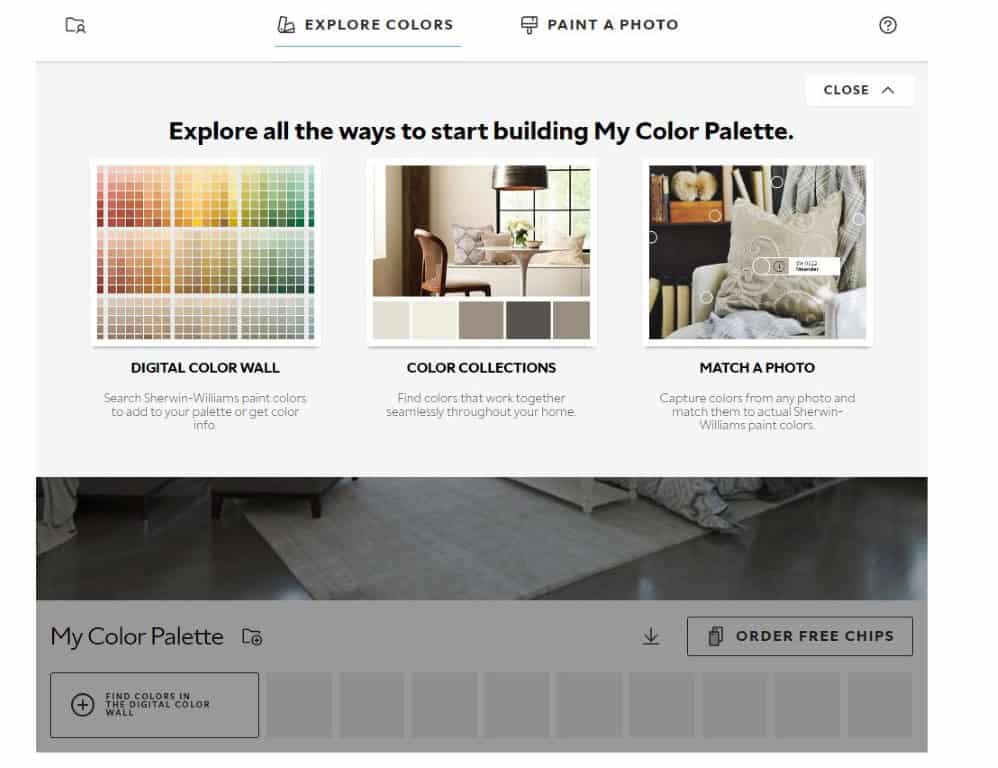
When you click on EXPLORE COLORS, you will see a few options: DIGITAL COLORS WALL, COLOR COLLECTIONS, and MATCH A PHOTO.

As you can see, there are so many color collections, and it’s hard to choose the best one, but there is a solution to that.
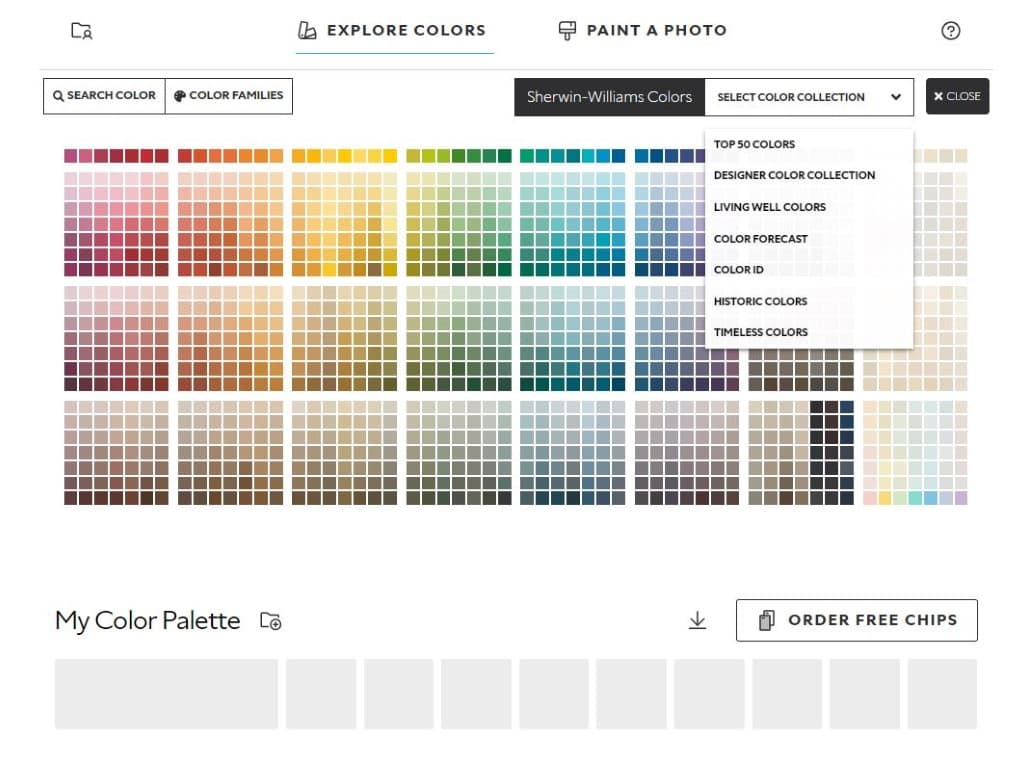
If you can’t choose something by yourself, just click on SELECT COLOR COLLECTION, and you will get some very useful suggestions.
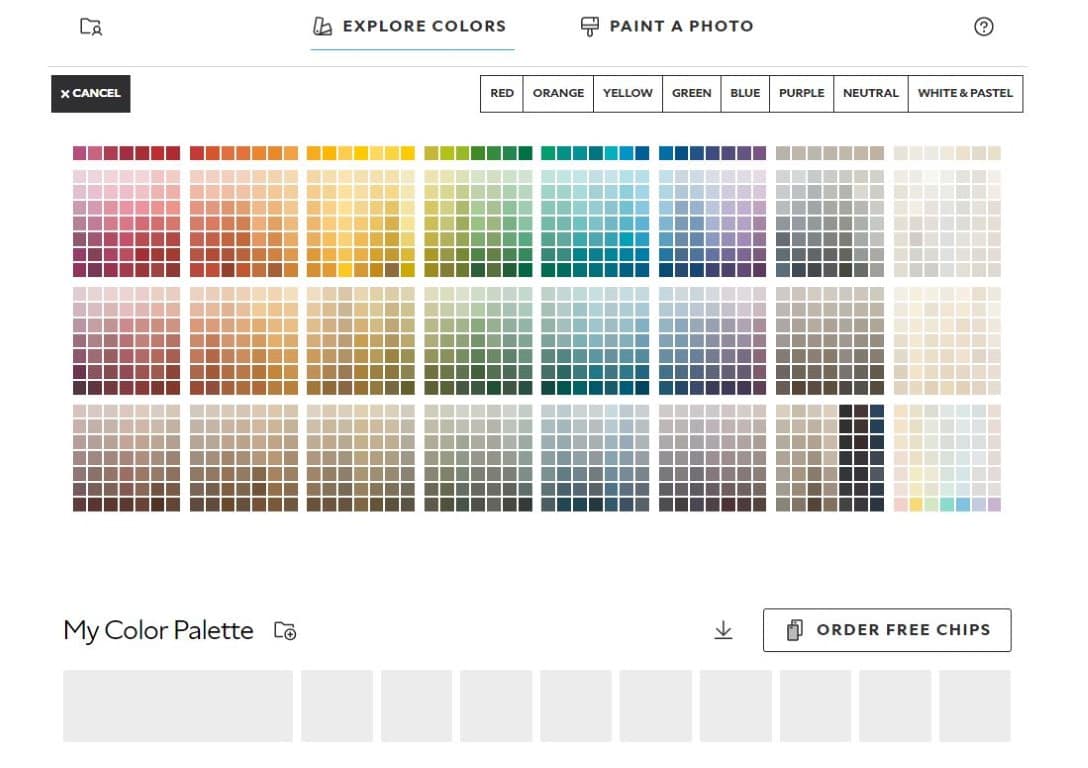
You can also search for colors by clicking on COLOR FAMILIES, and this will pop out.
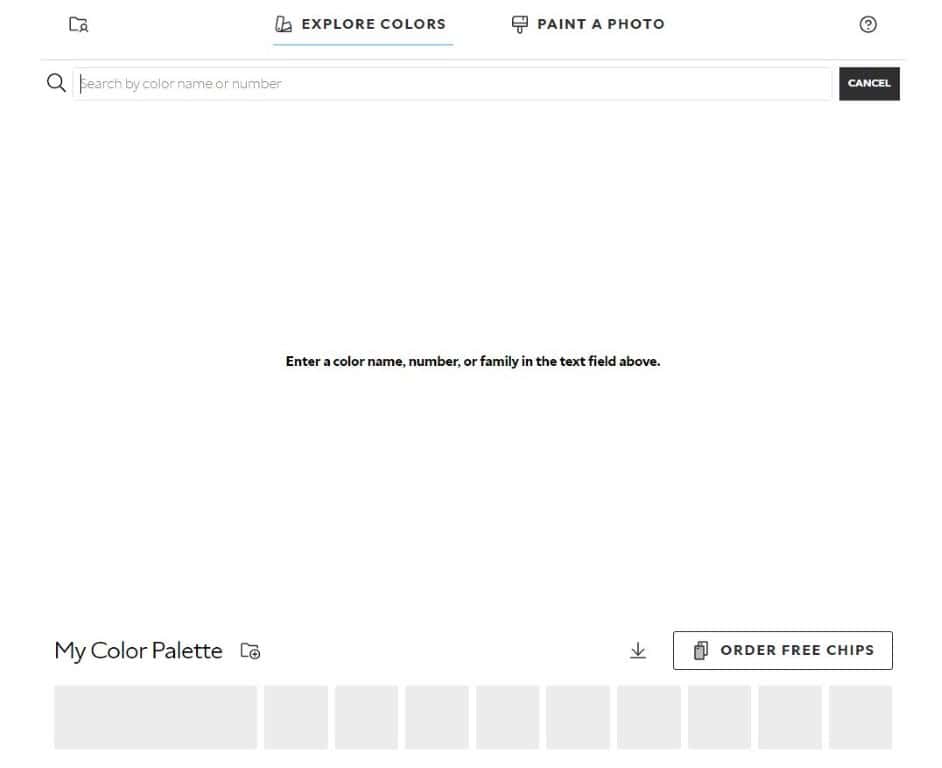
Of course, clicking the SEARCH COLOR option will allow you to find colors by name or number.
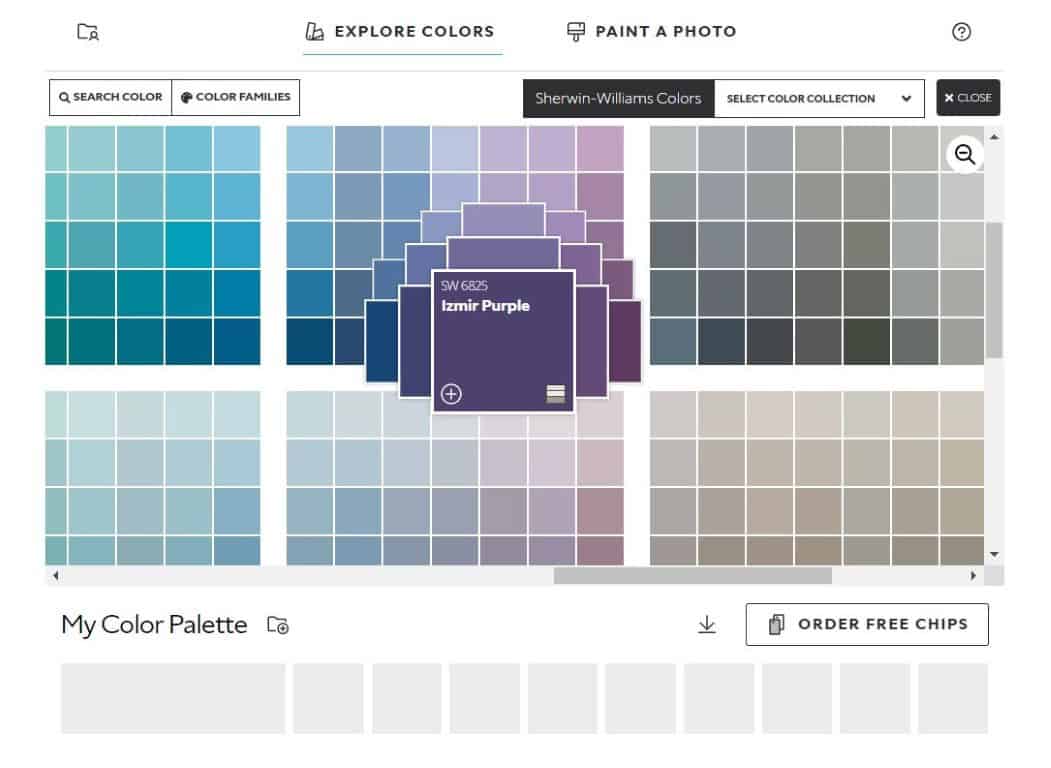
When you’re ready to add color to My Color Palette, just click on a color, and then click on a little plus sign in the lower left corner.
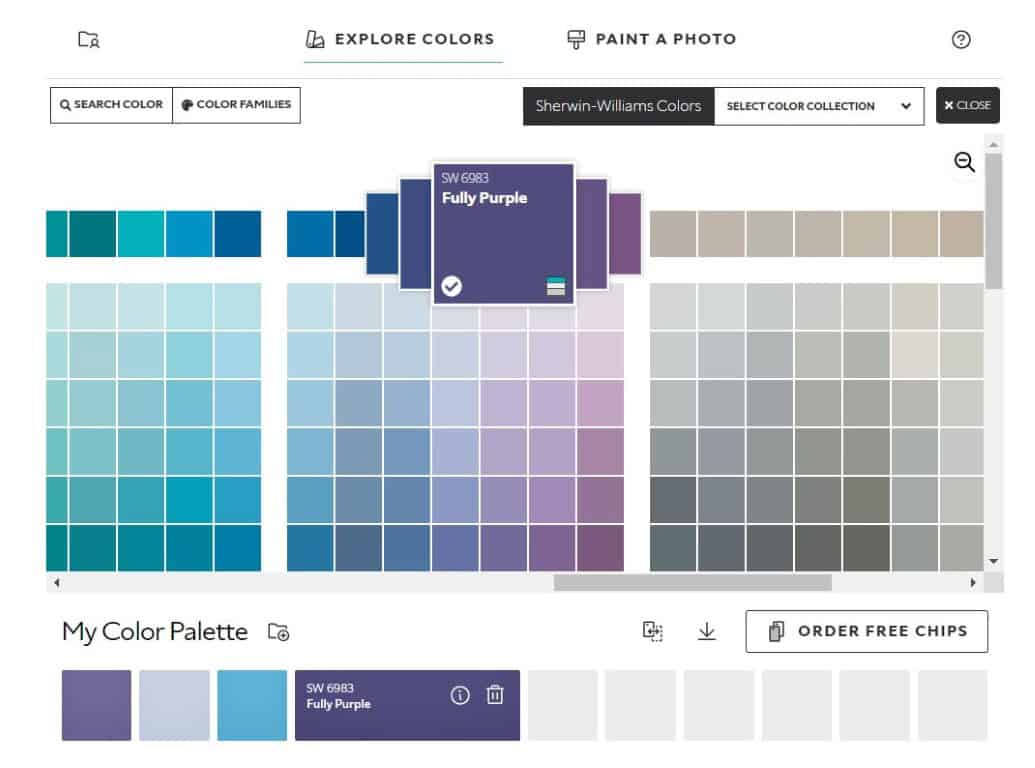
The plus sign will turn into a tick sign, and you will see the selected colors in My Color Palette.
You can remove them by clicking on a trash can sign, and you can also learn more about the color by clicking on the information sign.
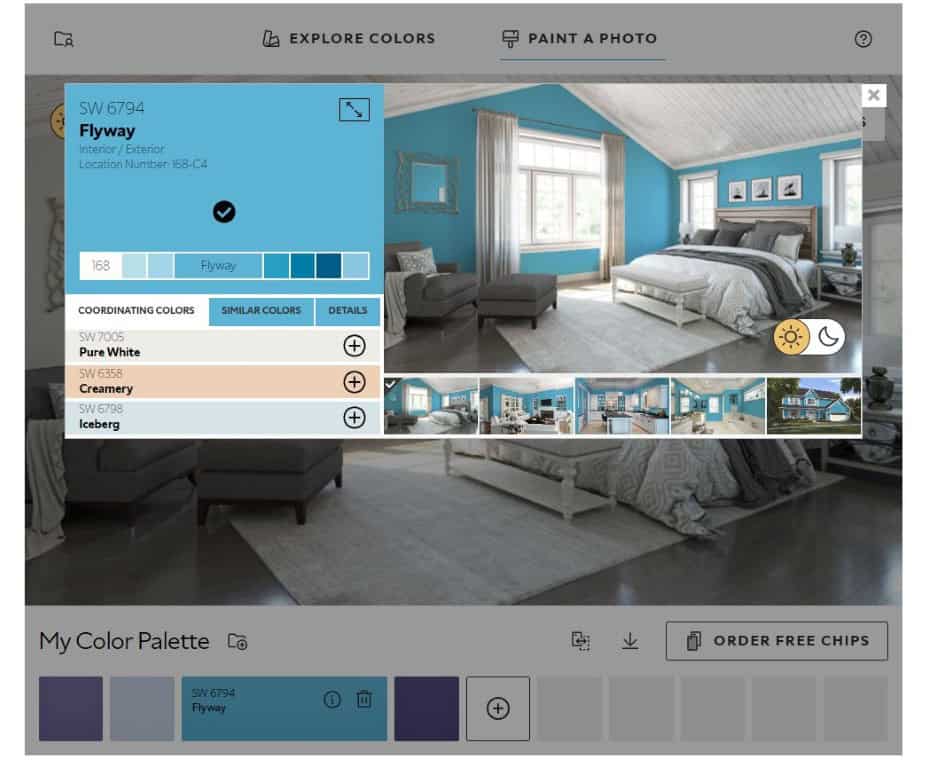
Here is what you get the you click on the information button.
These details can help you to match the selected color and explore similar colors too.
After that, just decide if you’re going to USE A SAMPLE PHOTO or UPLOAD YOUR PHOTO.
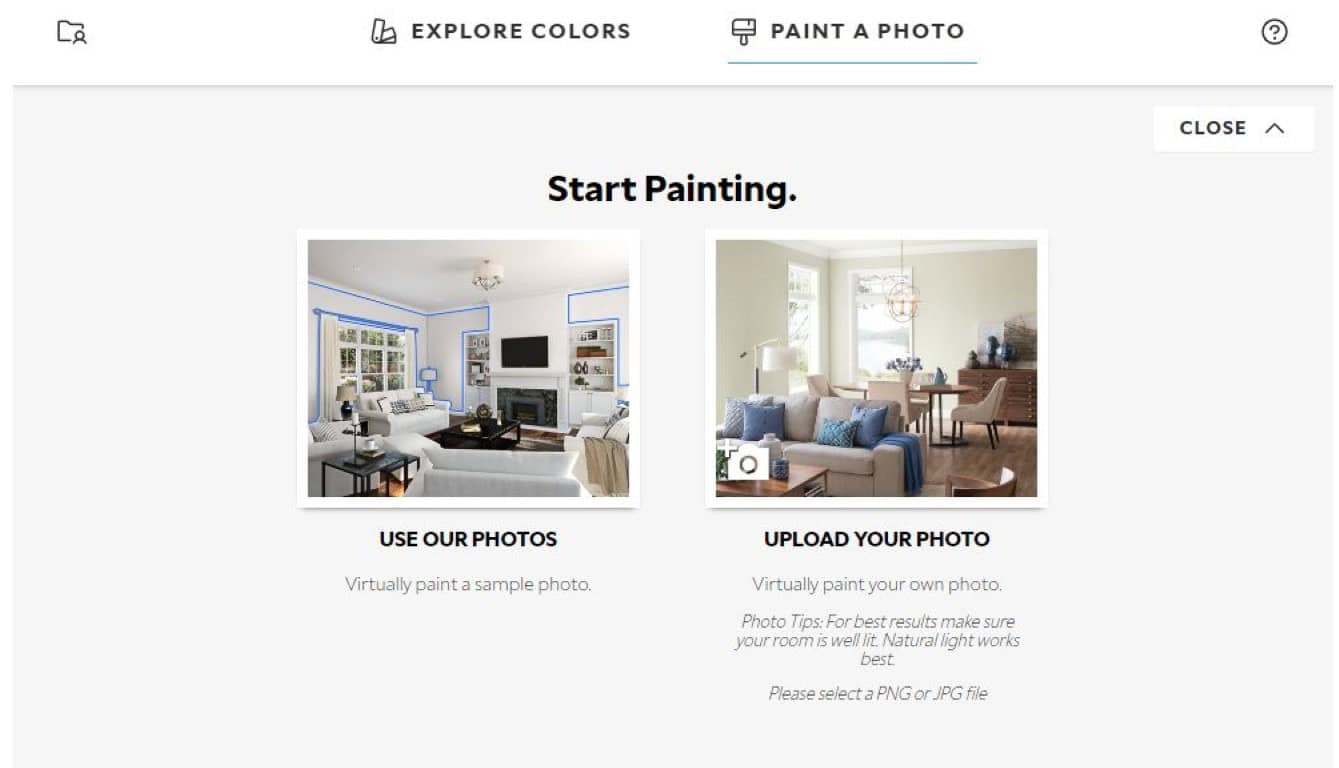
To show you how this tool works, I will use the sample photos.
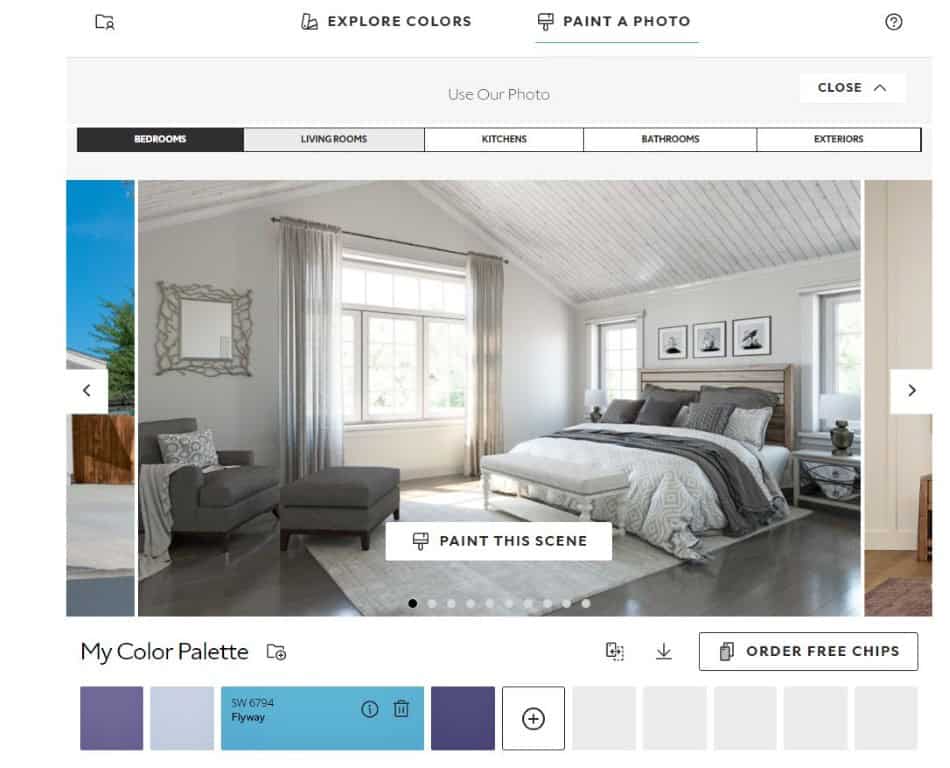
You can choose the scene you want to paint.
You can paint bedrooms, kitchens, bathrooms, living rooms, and the exterior of a house.
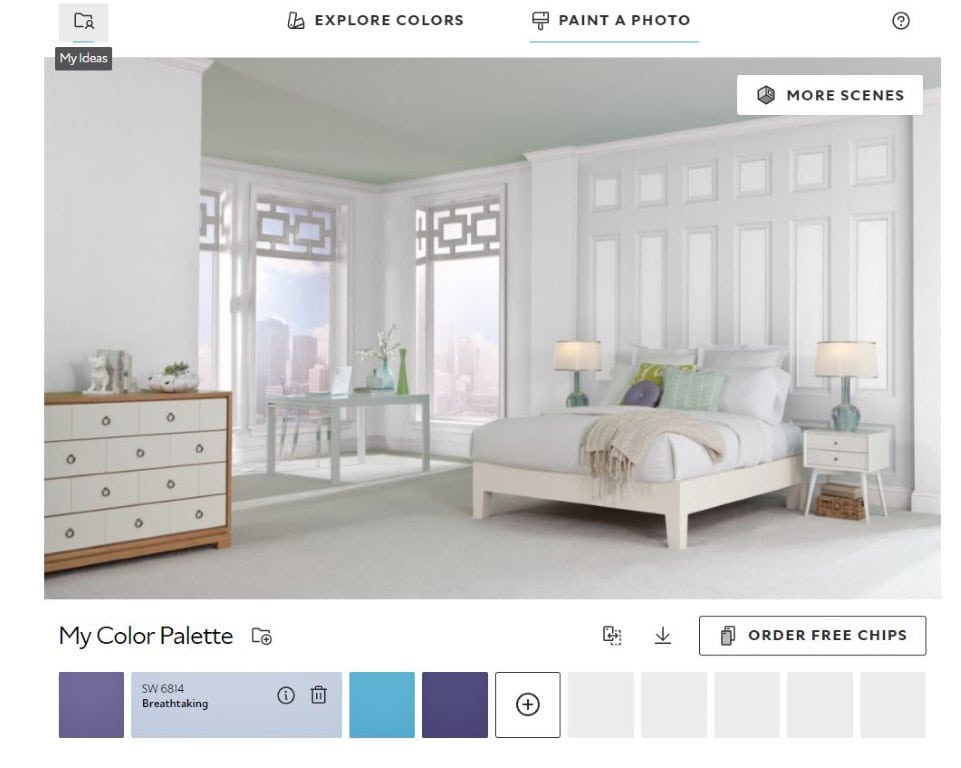
I chose a simple, white bedroom to show you the power of this tool. I also chose some vibrant colors so you can see the difference.
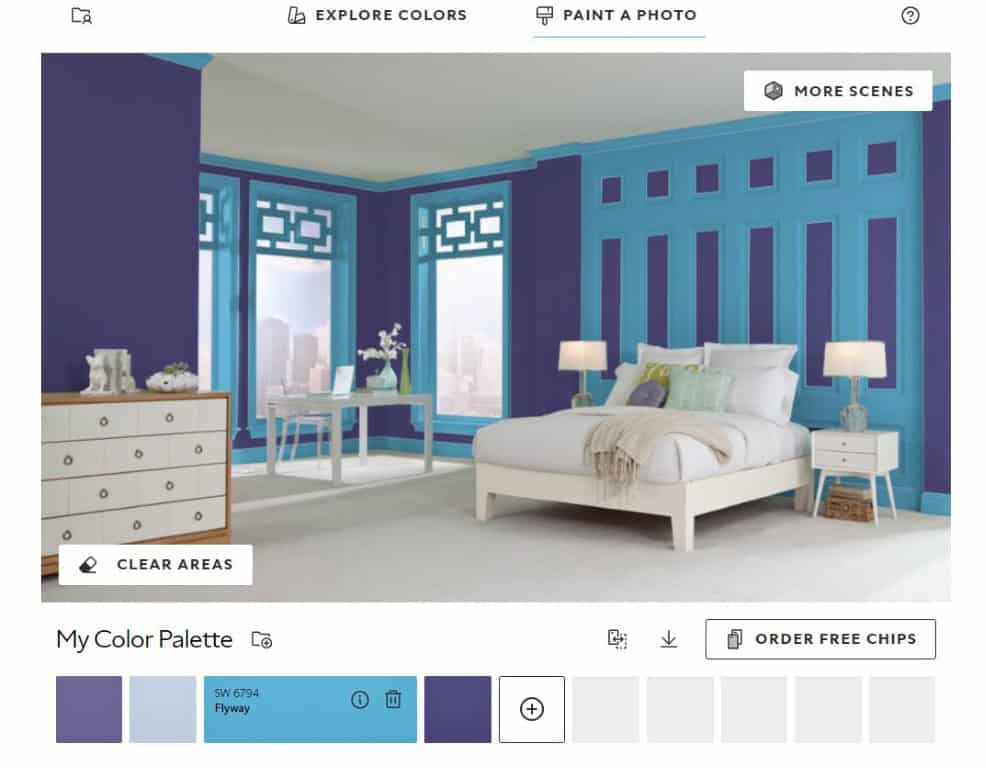
You can transform your rooms and you can play with these colors.
If you want to start over, just click on the CLEAR AREAS button.
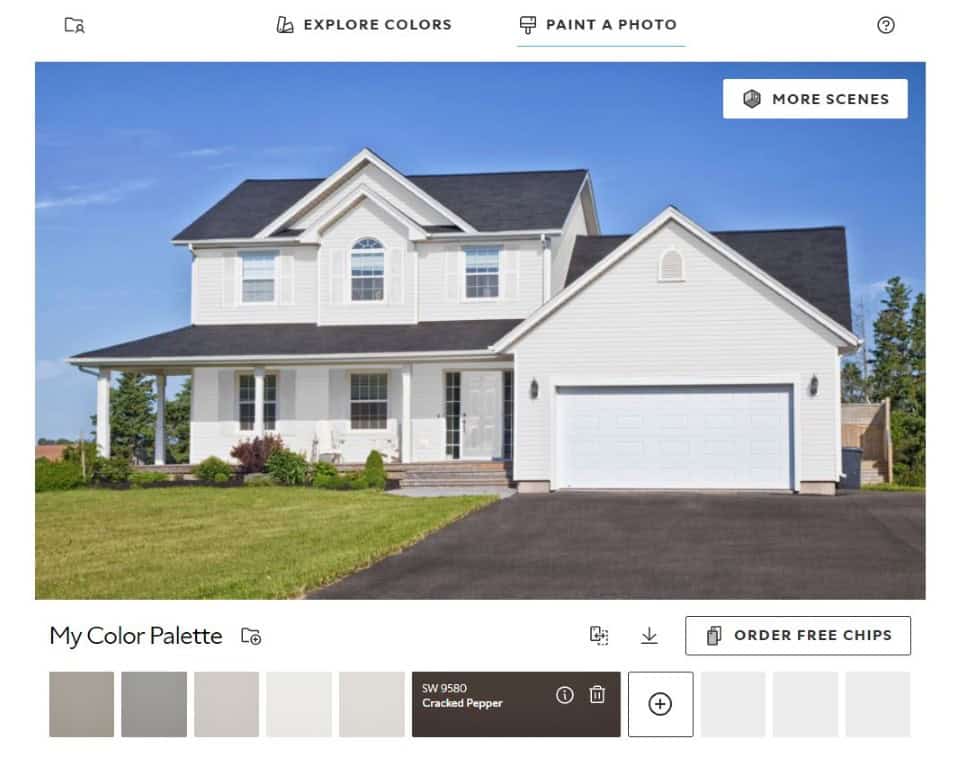
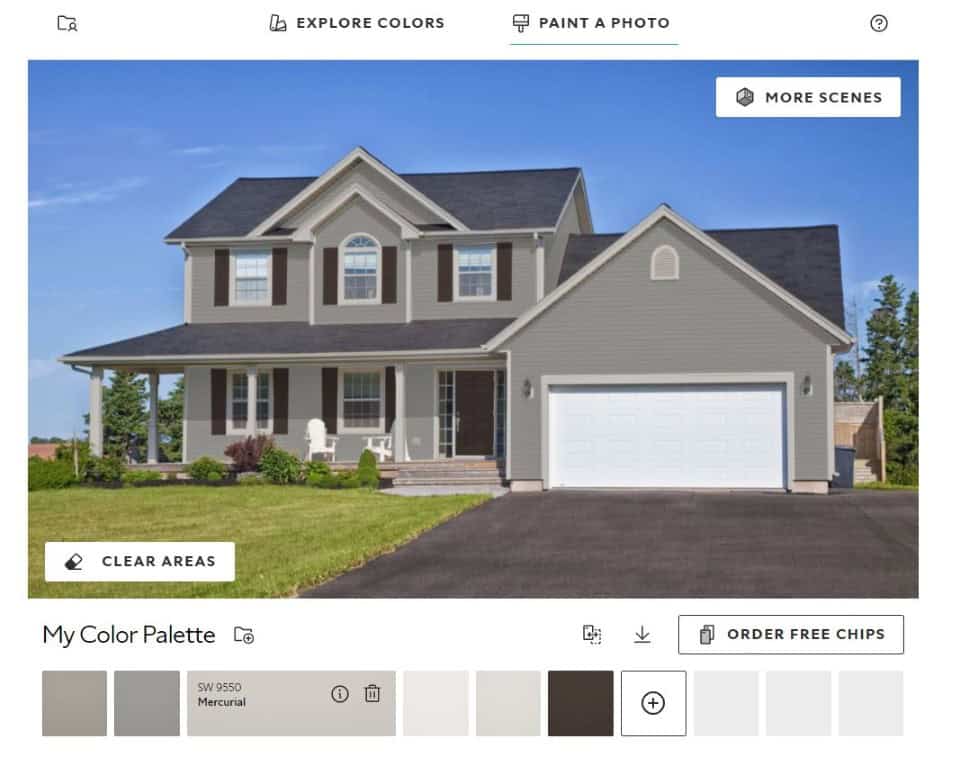
Here is an example of how well it works on the exterior of a house too.
If you click on the button located on the left side of a download button, you can compare the chosen colors from My Color Palette.
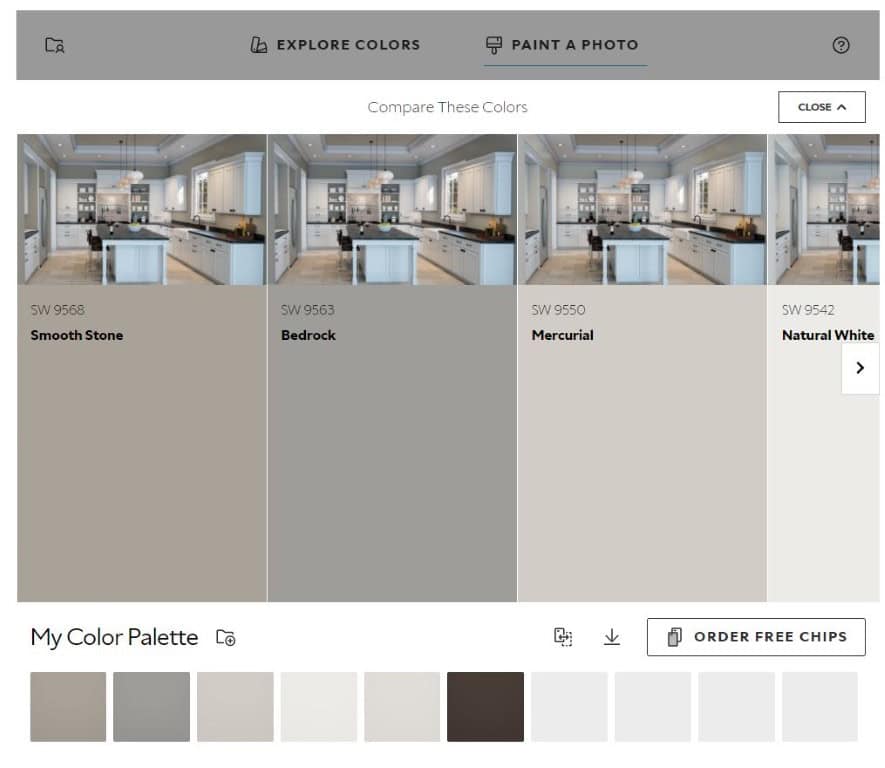
This allows you to compare and see the difference between the selected colors.
If you decide to upload your own photo, everything is completely the same, except for the fact you have a few more options when painting.
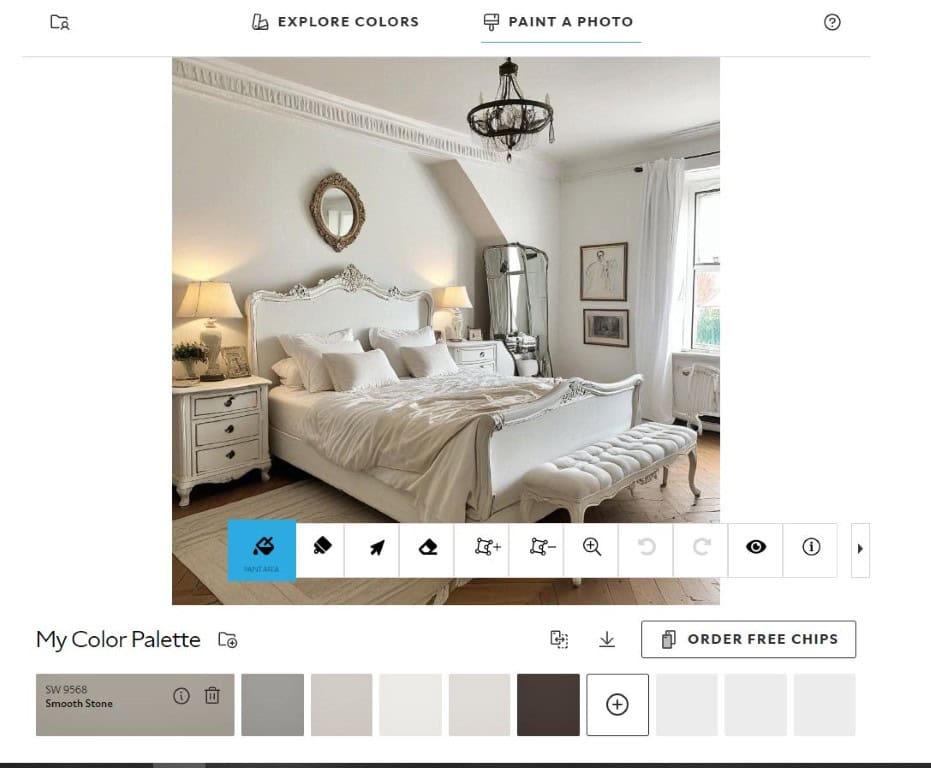
The first option is to PAINT AREA, but I suggest using a second one – PAINT USING BRUSH.
This will allow you to be more precise.
You also have MORE options:
- Select an area to manipulate
- Remove paint by erasing
- Select a polygon to fill
- Erase area by creating a polygon
- Adjust the zoom level
- Undo an action
- Redo an action
- Hide the painted area
- Toggle the tooltips
When you move the cursor to one of these options, its name will be displayed, so you don’t have to learn the meaning of these symbols.
As you can see, the Sherwin-Williams tool is quite useful and versatile.
Now that we tested it out, here are some pros and cons of it.
5 Pros Of Sherwin-Williams Paint Visualizer
- Color preview in different rooms and lighting.
- Wide color selection and design inspiration (many sample images).
- User-friendly and quick.
- Allows you to save and share your projects.
- Allows you to easily test the selected color from the comfort of your home, without going to the store and swatching colors.
5 Cons Of Sherwin-Williams Paint Visualizer
- Color Precision – you have to keep in mind that sometimes the color on your screen will look different in reality.
- The Lighting – if there is too much or too little natural lighting in your room, the results could be different in reality.
- 2D Visualization only.
- Doesn’t allow you to change the color of anything else besides the walls (no furniture painting).
- Doesn’t show the texture of the walls (some colors will look matte and some will look shiny depending on your walls).
Conclusion

Sherwin-Williams Paint Visualizer is a great tool that is very easy to use, and it gives you a lot of options.
It has its flaws, but it will certainly help you to develop your color ideas.
If you’re not a fan of sitting in front of your computer, there is also a Sherwin-Williams app you can use.
It’s called ColorSnap Visualizer, and you can read more about it on their page. Links for download are also available there.
Another app that also works wonders is called Paint My Room, available for both Android and iOS.

